How to Setup Menu Based Servicing
Setting up menu-based servicing allows your customers to book a vehicle service without tyres in their basket. You can also setup your pricing configuration to give your customer an accurate quote on their vehicle.
Once menu-based servicing has been enabled, you will see the tab appear at the bottom of the list.
Here is where you can setup all your servicing options.
Setting up the Comparison table
Before you setup the services you will need to edit your comparison table.
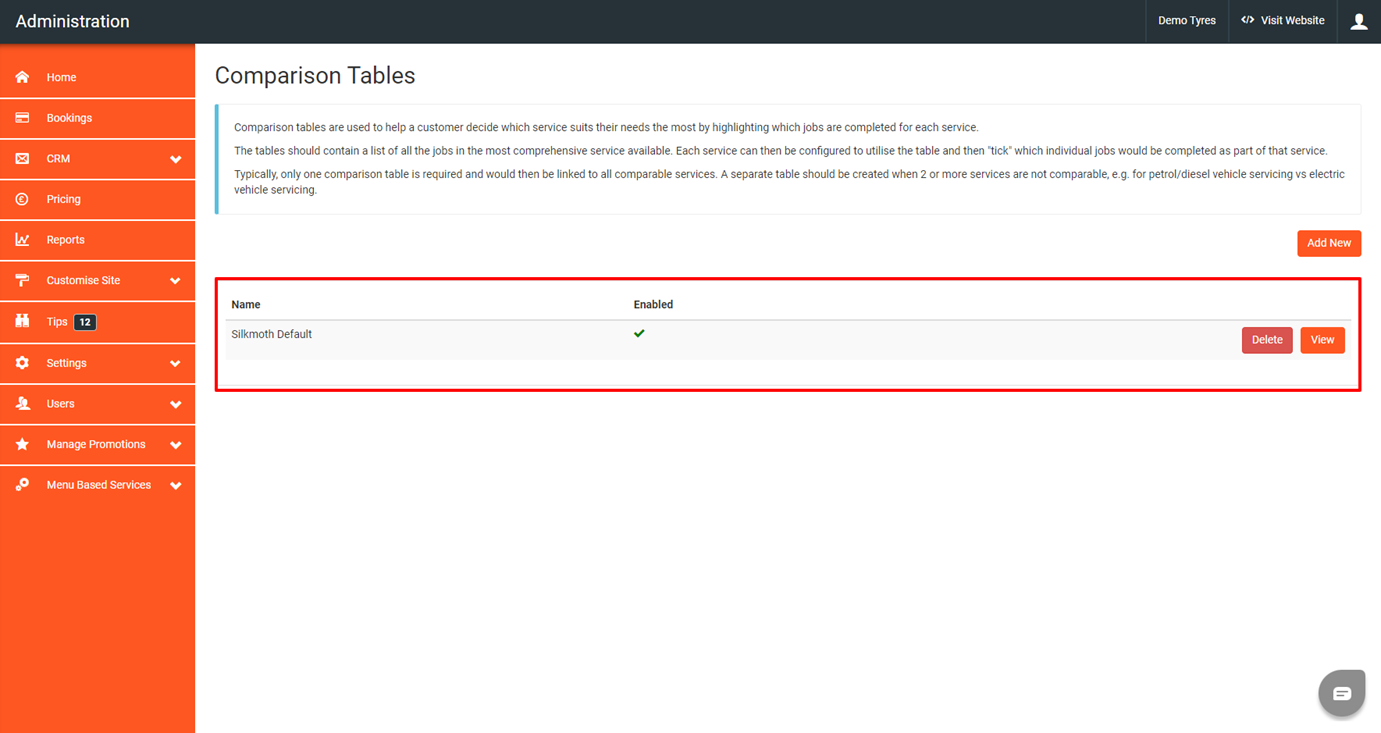
To do this, click the drop own arrow on Menu Based Services and click on comparison tables.

You will see a table here called silkmoth default. This is our default comparison table we provide to each customer, so you don’t have to start from scratch.
To customise this, click the view button.
We have some pre-set sections and then items in each sections.
To view the items, click the link shown below.
Here are all the item we have pre-populated for you.
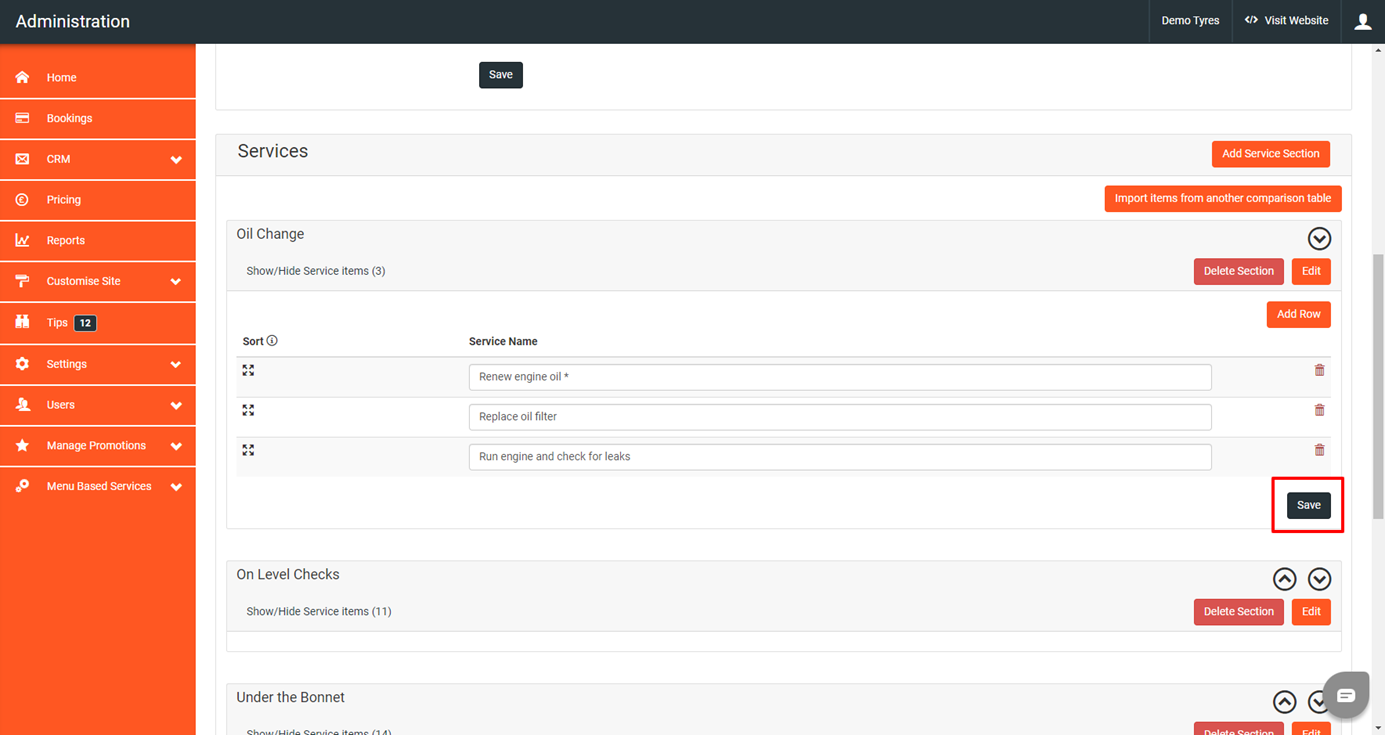
You can change the wording of these if you like. You can also add more rows or remove anything that you don’t want to keep.
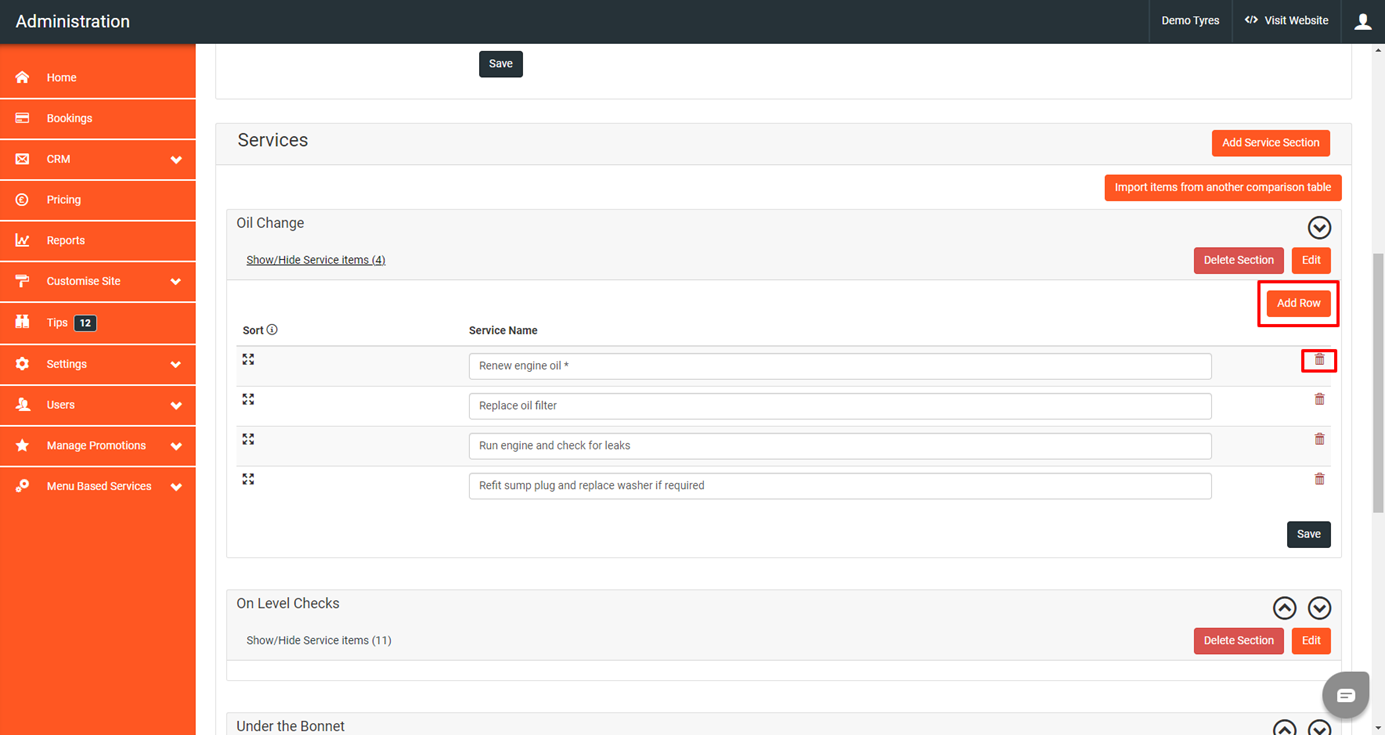
Once a section is fully complete, you need to click the save button in that section.
Create a Service
Now you have created the table, you need to make the services. To do this click on the menu servicing tab.
To create new servicing options, click add new.

Here you then create your first service type, normally businesses will offer a gold, silver and bronze service or a full and interim service. However, you can call the services what ever you like!
You can offer 1 or 3 servicing options, it’s up to you.
So to create your first option, you need to enter your service name, a strapline and a description of the service.

You then can add an icon/image to your service. We have some pre-made options for you to choose from or you can add your own image.
Once you’re happy, click save to go to the next section.

This next section is where you add your caparison table you create earlier.
To show the comparison table, click the ‘show service items’ tick box and select the silkmoth default table from the drop down menu.
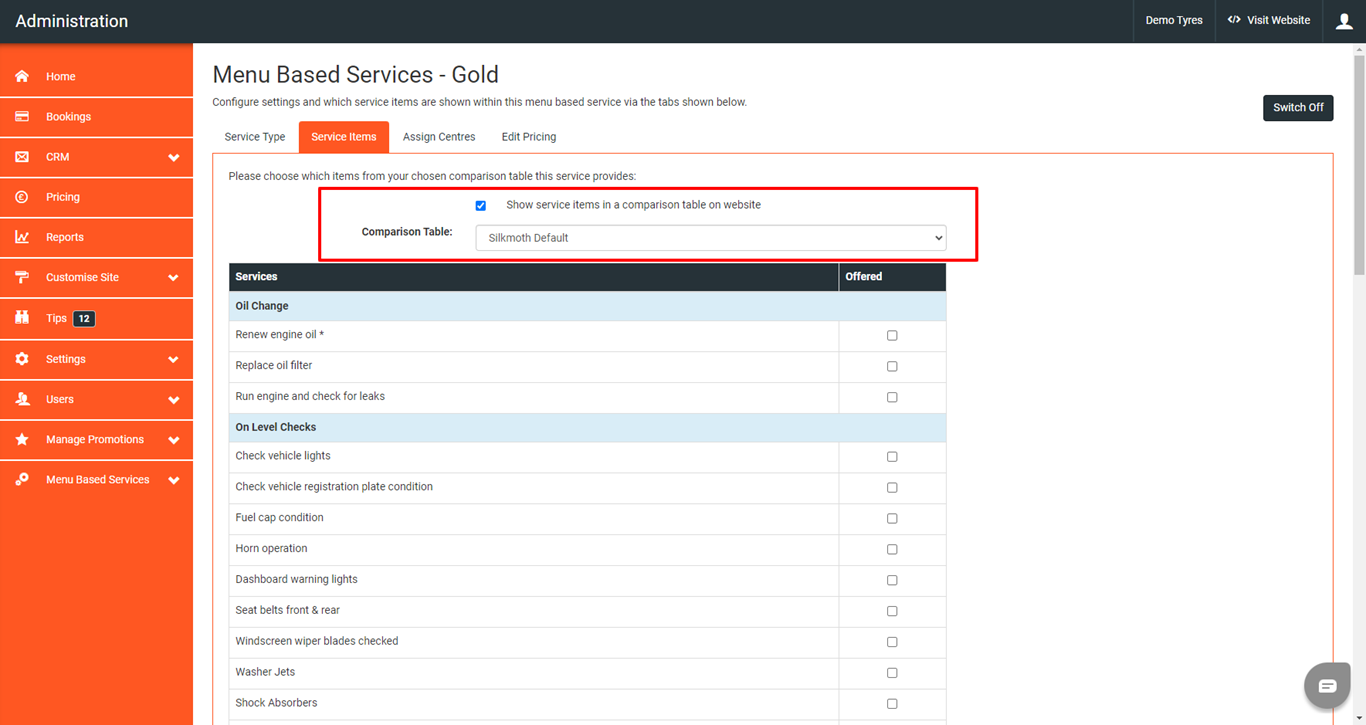
For each service you create you will need to go through your comparison table list and tick all the aspects of the service that are included.
Once you’ve ticked all the relevant offered services, click save.

Next is the Assign centres tab.
In assign centres you can chose which of your websites this service will show on.
To do this, select your centre from the list on the left and then click the arrow that points right.
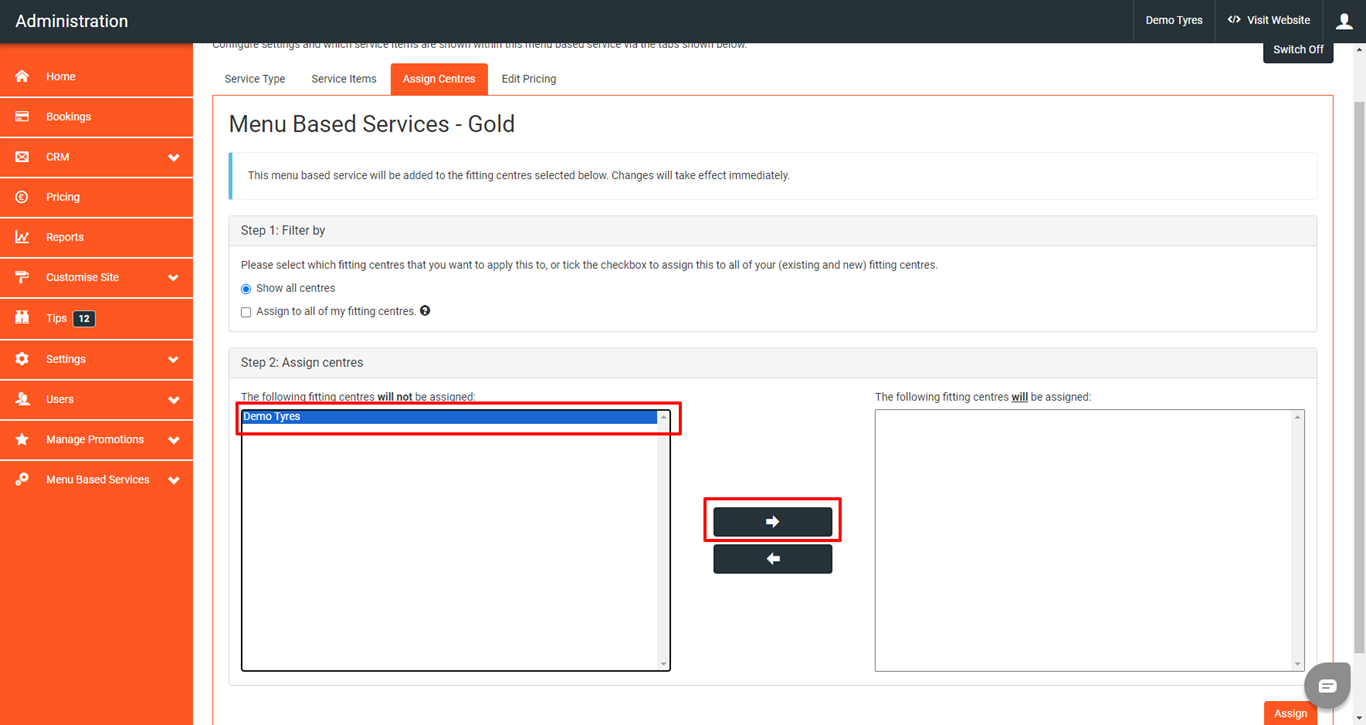
You will then see your business in the right list. To save you changes click the assign button.

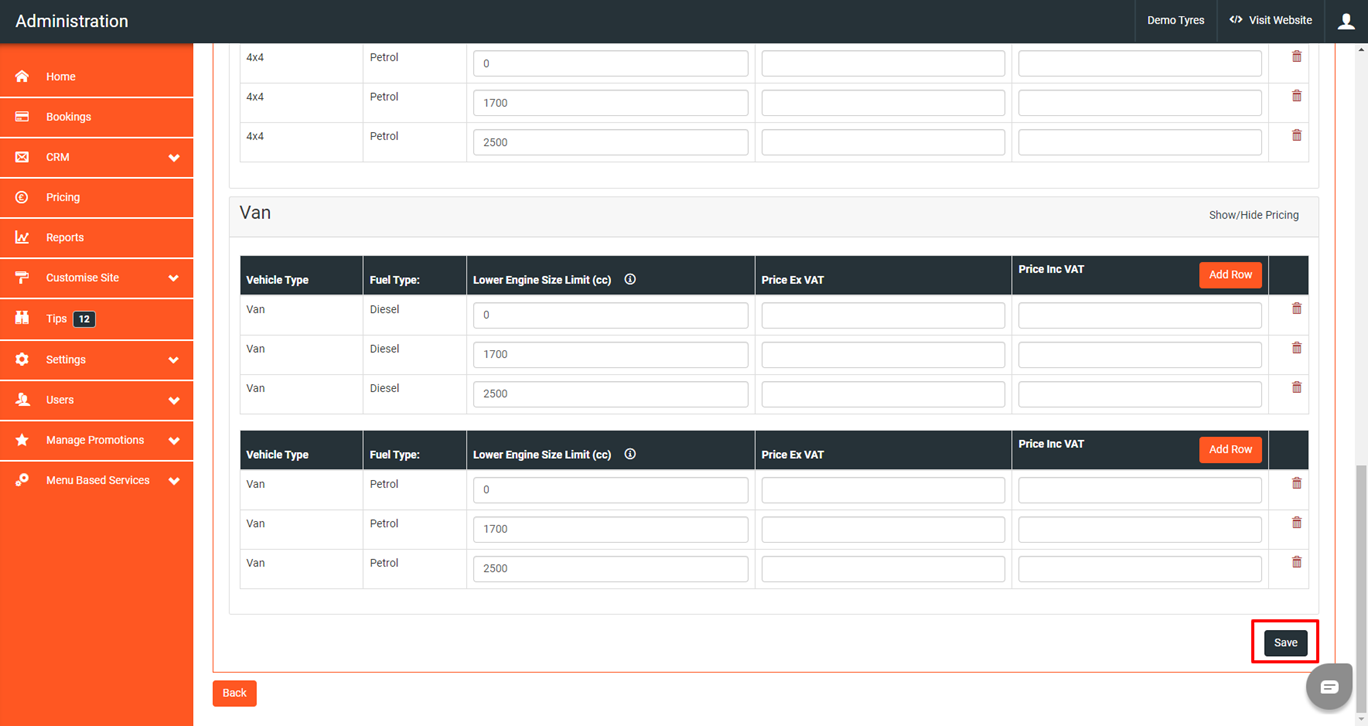
Finally, you have edit pricing.
You can set your pricing per vehicle type, engine size & fuel type.
To add a row click the add row button. And to remove a row click the red bin icon next to the row you wish to remove.

Once you have updated all your pricing, click save.
After this click on your menu based servicing tab. You can now see the service you have created. To create a different level of service, you will need to go through all these steps again.

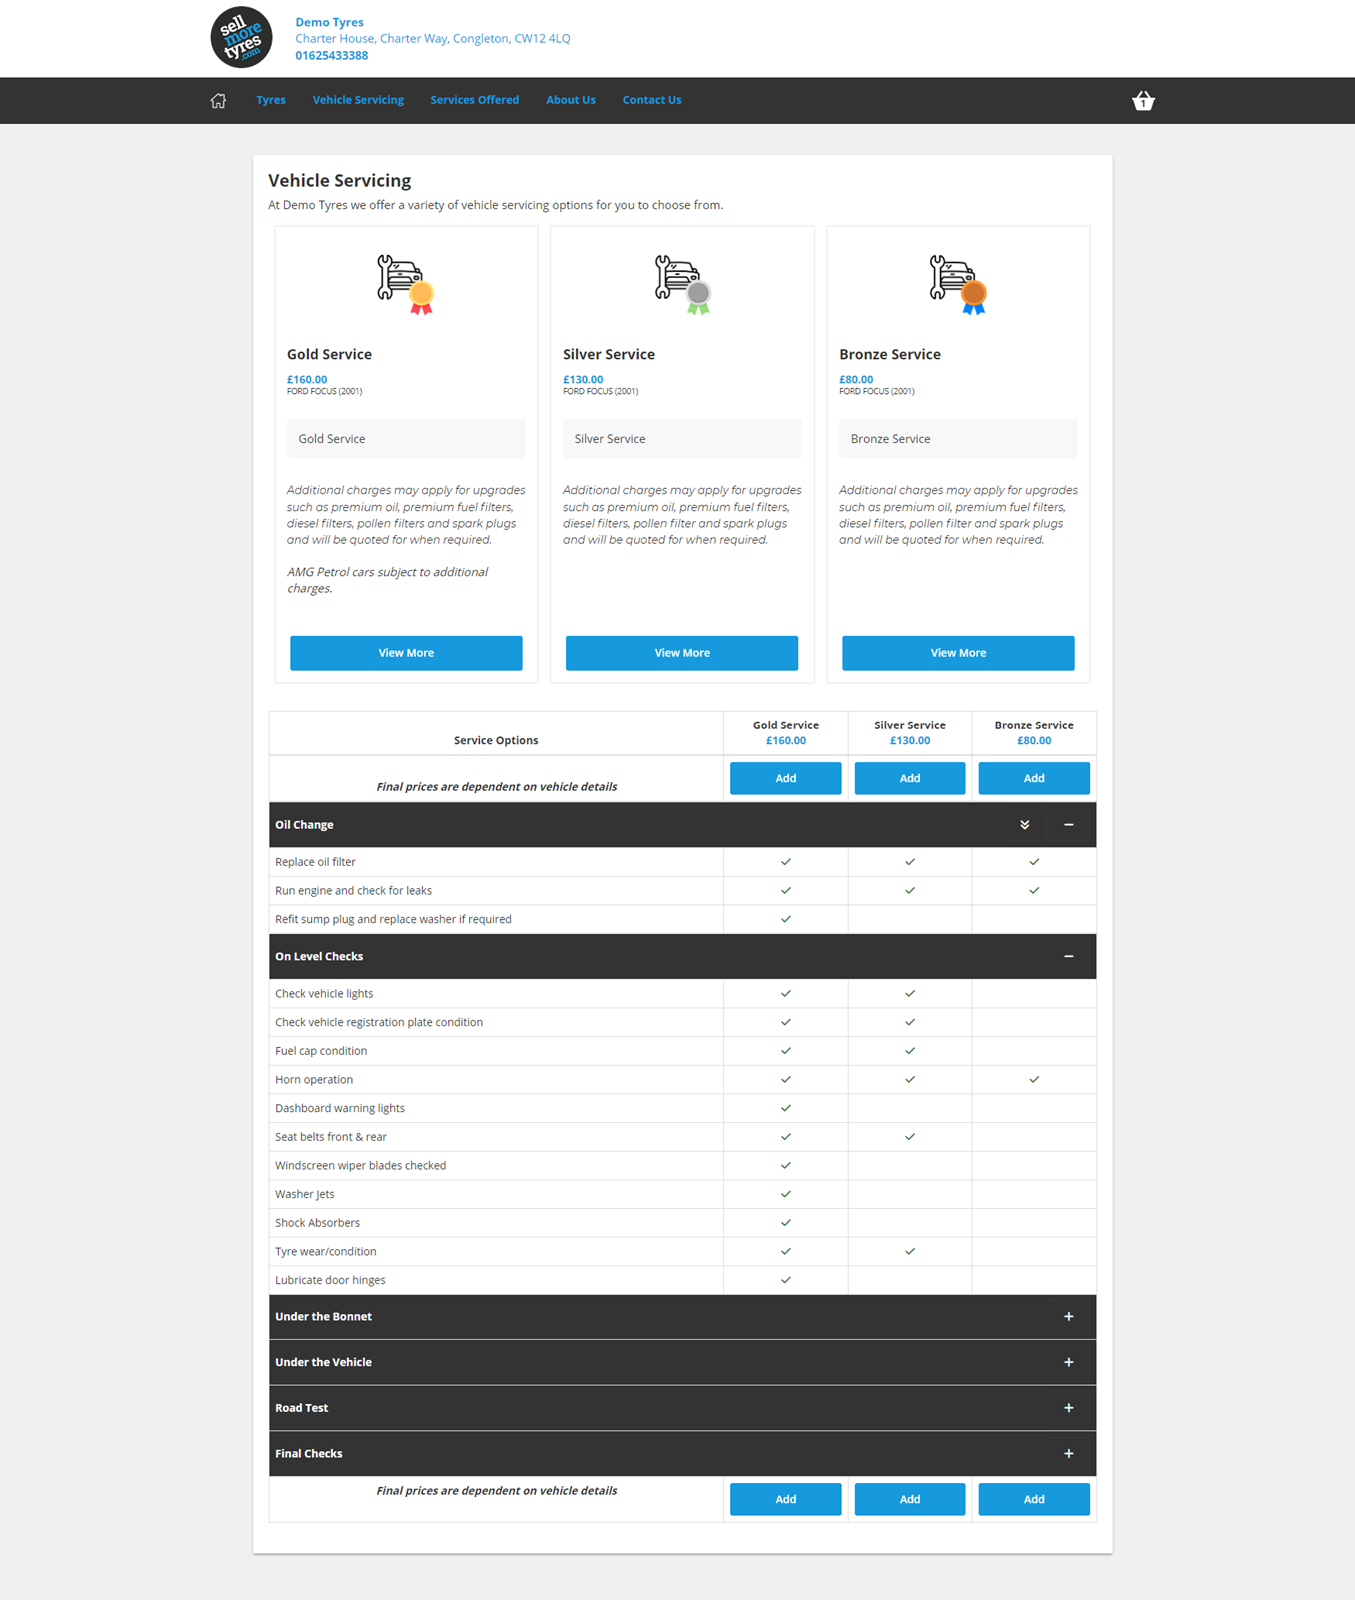
Your Website
On your website, you will now have a vehicle servicing tab. Once clicked, customers can search their reg to get an accurate quote. Once searched your comparison table with show with all your servicing options.

If you need any help setting up your vehicle servicing, please contact our support team.